Webs TT is a WordPress hosting provider and we are known for our excellent support and highly optimised hosting plans.
We make it super easy to install WordPress. This article will explain step by step how to get your wordpress website started.
Are you ready? Here we go.
First, you need to login to your Webs TT dashboard. If you're not yet a member, you will need to create an account.
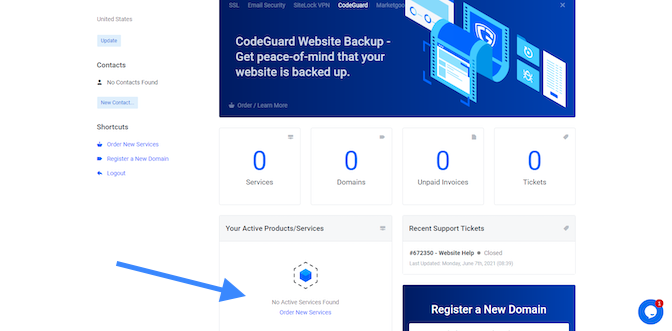
When logged in to your dashboard, simply scroll down and click "Order New Services".
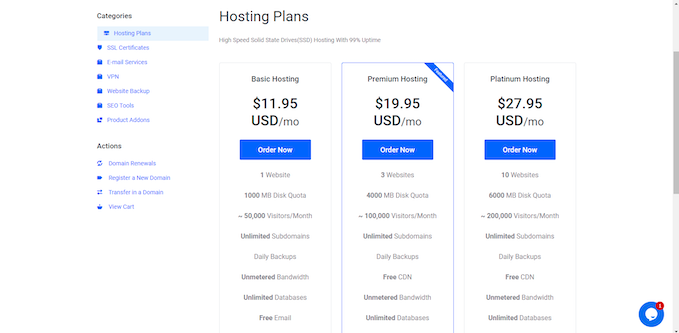
Next, you then choose one of the hosting plans based on your website(s) needs. Every website on the internet is 'hosted' somewhere. It's where your websites files are securely kept. (The most popular plan is the "Premium Hosting".)
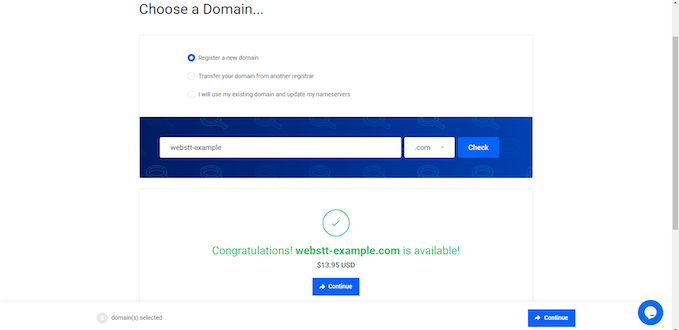
After which you will need to choose a name for your website. The internet is full of already taken website names, so you will need to check to see if the name you want for your website is available. Once you have found the perfect name for your website and confirmed it is available, you need to secure it as soon as possible, so you click 'continue' to proceed.
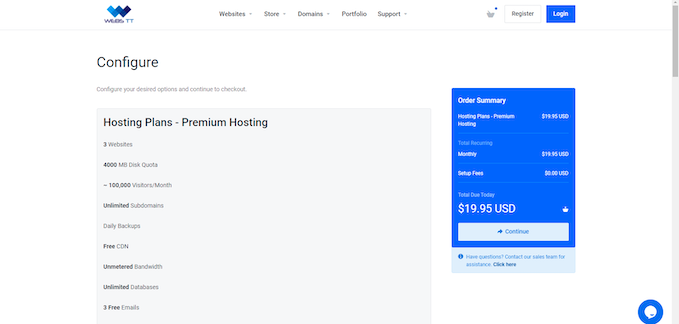
Here you are taken to the configure products page, where you can choose to get a few necessary addons for your site such as an ssl certificate (also known as the padlock for security), seo tools and social media account creation for your website. You do not absolutely need these just yet, but we recommend that you at least choose a ssl certificate for your website now. When you are done with this click continue.
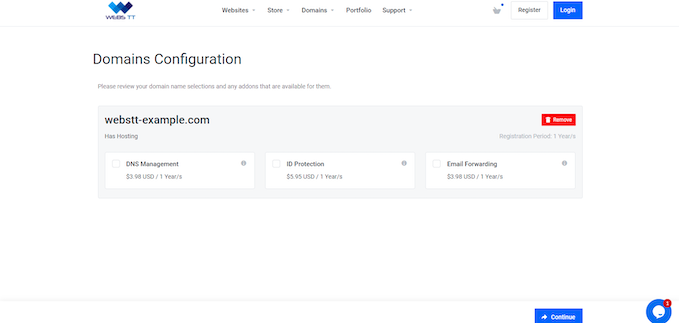
You would be asked to review the domain name to make sure the spelling is correct. You can also choose any of the addons available. These addons are not absolutely needed at this time, but you can choose to add protection to your site from now. Then proceed by pressing the "continue" button.
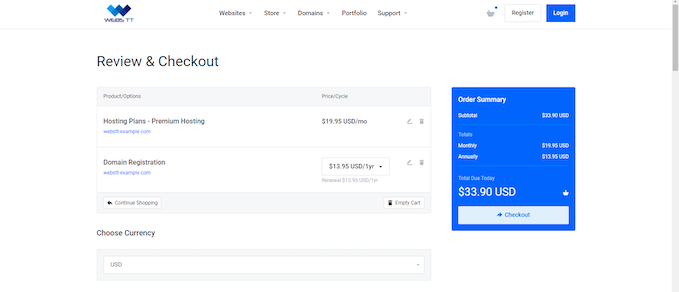
Now that you have your mandatory hosting area to secure your files and your personal domain name, checkout.
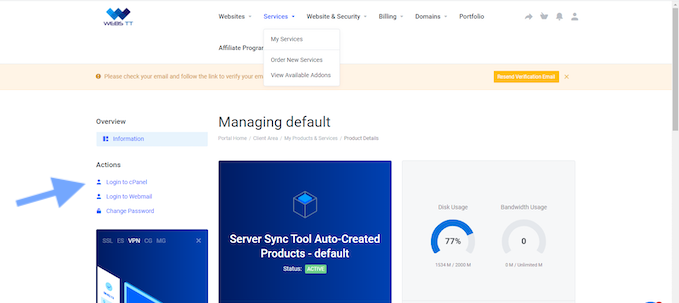
You are now taken back to your dashboard area, which now has a lot more options when you click Services>My Services.
Your website's cPanel area has just been automatically setup, and you are ready to install WordPress and start work on your website. So simply click "Login to cPanel" (located in the left-side column).
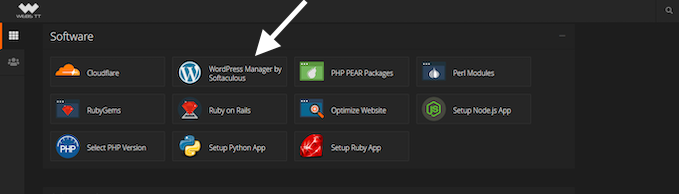
In your cPanel area you have a ton of tools to help you with your website. To easily install WordPress, scroll down to the "Software" section, where you will click a tab entitled "WordPress Manager by Softaculous".
Click on the Install button.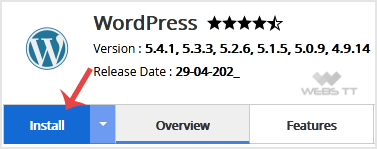
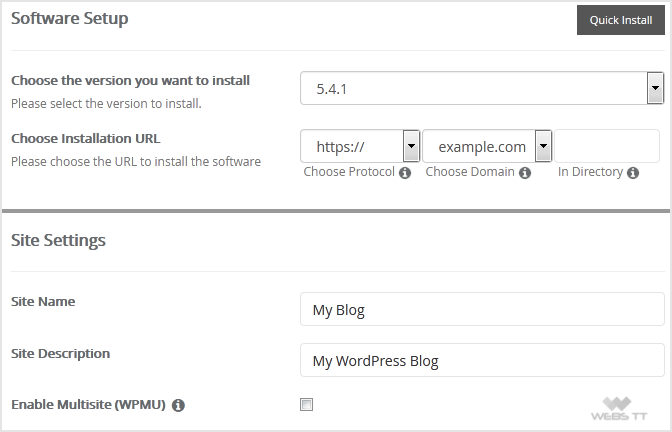
Fill in the fields under Software Setup:
- Choose Installation URL: Choose the appropriate protocol/domain. If you did not purchase and install a ssl certificate you should select 'http'.
- You can leave the "In Directory" field blank.
- Choose the version you want to install: You can leave this as is.
Under the Site Settings field, enter the following information:
- Site Name: Enter the name of your website, such as my first website.
Site Description: Your site description. - Enable Multisite (WPMU): Leave this as it is.
Under the Admin Account field, enter the following information:
- Admin Username: Your new WordPress username (for security reason do not use the Administrator or the Admin username.
- Admin Password: Use a strong password.
- Admin Email: Your e-mail address.
Note: Copy the admin username and password on a notepad because you will need these login details to access the admin area of your WordPress blog later.
Choose Language: You can choose the language of your WordPress blog. The default language of WordPress is English.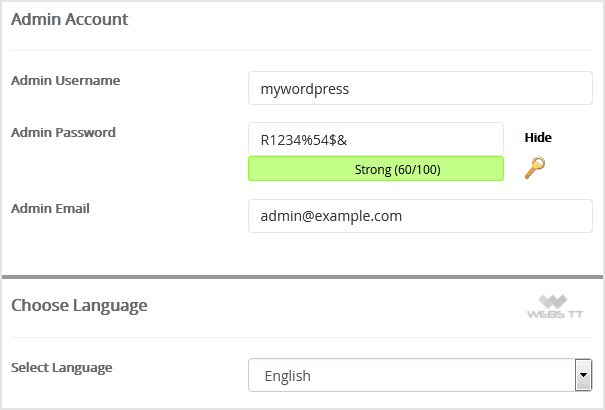
Select Plugin(s): You can skip this or select plugins you wish to install.
Advanced Options: Leave this as it is unless you want to change the database name or take an automated backup. Please, note that creating frequent backups may take a lot of disk space.
Select Theme: You can select any available theme. If you do not want to do this, leave it as it is, and WordPress will use its default theme.
Finally, scroll down to the end of the page and click the Install button.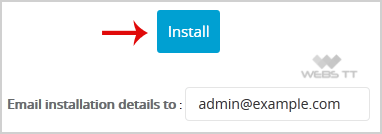
That's it! Your WordPress website is all set! You can now start work on your website and begin sharing your website with your friends and potential clients.
You can check out our other helpful WordPress articles for more instructions.
Feel free to contact us at anytime for further assistance.
